Tuesday, July 31, 2012

It's OK To Be Snaky

I'm kinda digging this snake necklace trend I've been seeing lately...so I scoured the web for a few great {and affordable} finds:


Tiffany Style Little Snake Necklace
Michelle Monroe Double Twirl Snake Necklace

Italian Murano Glass Snake Necklace

Sterling Silver Double Snake Necklace


I think the last one is my favorite. So whatcha think? Will a slithery serpent grace your neckline any time soon {hopefully not a real one}?


Find me and follow on Facebook, Twitter & Instagram 
Add my RSS Feed to your Reader

Monday, July 30, 2012

Weekend & Off To Visit Family

This weekend wasn't too exciting...I worked overtime shifts both days, super-cleaned house {I must officially dub myself a Super Mom because the house is clean down to the baseboards} and started packing because tomorrow Jake, the boys and I are off for a much-needed and long overdue visit to Idaho to visit my family and friends. We will fly back on Breckin's 2nd birthday, August 8th. {Good thing he's only going to be two because there's no way he'd let us live this one down if he was old enough to realize we are spending his entire birthday flying back across the country!}

I haven't been back to Idaho since Christmas of 2007. Tanner had just turned two and it was just him and me. {Tickets are crazy-expensive, so Jake stayed behind...in fact, Jake hasn't been to Idaho since we stopped through on our way to move to Charleston when I was pregnant with Tanner.}

Check out the sweetest picture ever of this kid in Idaho snow:


Oh, he just melts my heart. I don't get to see them bundled up like that here in Charleston. I can't believe this guy is almost SEVEN. Where does the time go?

I'm also excited about seeing this girl:


My Shelby. {Pardon this terrible photo of me! And don't mind her creepy red eye...she has one blue and one brown and this always happens to just the blue one in pictures of her.} She is turning 14 on August 9th. I know this will likely be the last time I see her...it's so unfortunate that dogs don't live as long as we do. I remember bringing her home in 1998, just a bouncy little puppy...I basically forced her upon my parents knowing that they couldn't say no if they had a chance to see her and hold her. She turned out to be the best dog. I always won those kinds of battles when I was younger {that's why at any given time, we had two dogs and six cats...}

Here's a picture of my old stomping grounds...Twin Falls is a quaint town with a lot of mom-and-pop retail...but it does have its character...and beautiful views like this:

The Perrine Bridge - Snake River Canyon - Twin Falls, ID

That bridge is actually one of the ten best bungee jumping spots in the world. {I'm not speaking from experience here.} I am definitely taking the boys down in the canyon for some hiking and beautiful scenery.

My mom lives in Boise, ID, so we will have some decent nightlife opportunity at least and are also getting a tour of the famous Smurf turf {my mom works at BSU}...

via
She says TV doesn't do it justice; that it is the most amazing royal blue. I'm hoping to get to touch it...maybe roll around a little...do some cartwheels...

In other news, there are TWO big things that happened this weekend...and they're actually considered milestones in my book.

#1: Breckin went from this:


To this:


I can't even believe how much older he looks! It kind of broke my heart a little...but he'll be 2 in a week and 1/2...Tanner got his big boy haircut at 19 months. He does look super handsome though {in my expert opinion!}

#2: Literally. Breckin's first semi-successful attempt at the potty and it was a #2! By semi-successful I mean it was only a little bit, but it's SOMETHING! And he came to me and said "Momma, poo poo potty." I have a feeling this one is going to learn a lot faster than the first. {Thank you to the Elmo potty video he is obsessed with!}


While I'm gone, I will still be posting on here as I regularly do...and I will let you know all about the trip when I return. It's important to see family, and I'm glad we finally get the opportunity. xoxo
Find me and follow on Facebook, Twitter & Instagram 
Add my RSS Feed to your Reader

Sunday, July 29, 2012

Friday, July 27, 2012

Lego Storage

Some of you may know, I used to have a blog called [just had] A Bright Idea where I focused mostly on interior design & decor and some DIY-ing. When I started Style Oyster, I wanted to incorporate those things along with my love of fashion and all things, well, stylish. Unfortunately, leaving that blog for a new url posed it's challenges. I lost the readers I had acccumulated over the 6 months of having the blog as well as the content...but wait, that content is NOT lost! Thanks to Blogger, I was able to move it over to Style Oyster. However, it was a little outdated (the wording in some, etc.) and of course the pictures were all tagged with my JHABI logo (and a few with even older blog logos than that! I had some name change issues...) I am putting this paragraph here as a preface to these posts because even though they are from the past, they are still projects that took a long time and are dear to my heart and I didn't want to lose them when I officially take my old blog off the Internet. So I apologize to those of you who have followed me since [just had] A Bright Idea, as you will be experiencing some deja vu, but I know some of you are new and this may all be new content to you. So bear with me, I plan on posting these once a week until they are all on Style Oyster. Thank you so much, and I do hope you enjoy. xoxo

----------------------------------------------------------------------------------------------------------------------------------------


Tanner has been long overdue for a good Lego storage solution. The kid has been obsessed with them for the last two years and they are always a big unorganized mess - usually scattered all over the floor.

A few weeks ago, I searched "Lego Storage" on Google and was pleasantly surprised to find I wasn't the only one who had an issue with Legos scattered all over the floor. I found some great pictures and great ideas. I decided that out of all the ideas, I liked the ones where clear plastic bins were used and they were separated by color.

I immediately went on an online search to find a cart of enough plastic bins to segregate the array of colors of Legos he has. I was a bit surprised to find what some stores are actually getting away with charging for a simple cart of plastic bins. It's plastic, people, NOT titanium.

So I was sad and thought that this project would have to be put on hold for a little while until I could a) afford to buy the cart, or b) magically happen upon a cheaper version randomly in a store one day. Then I had an "a-ha" moment...(I love those)...and realized that I had this piece of furniture that I had never exactly made practical use from (this is actually an old pic I took when I was considering selling it on Craigslist! THANK GOD I didn't!):


It was perfect. All I had to do was take measurements and find either two or three plastic bins that would fit perfectly across each shelf. Off to the dollar store I went. I found 12 that fit perfectly in the shelves when set three across.


Now to the organizing. This step took the longest. I enlisted Tanner's help because I knew he'd a) be into it because he loves anything to do with Legos, and b) he'd be more likely to keep it organized if he too spent the time organizing it. (And I'm happy to announce that so far, it's worked!)

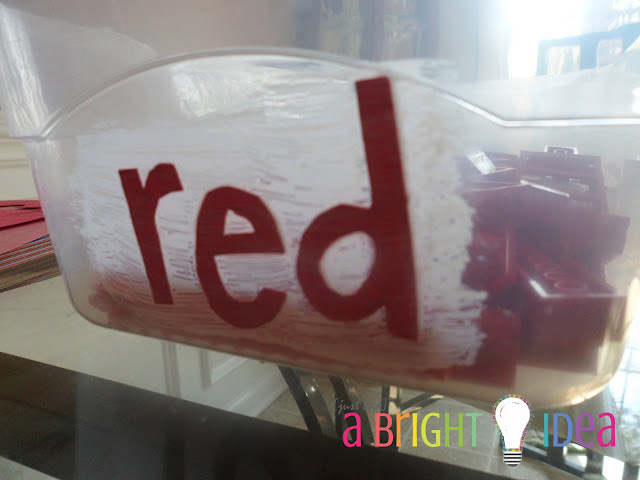
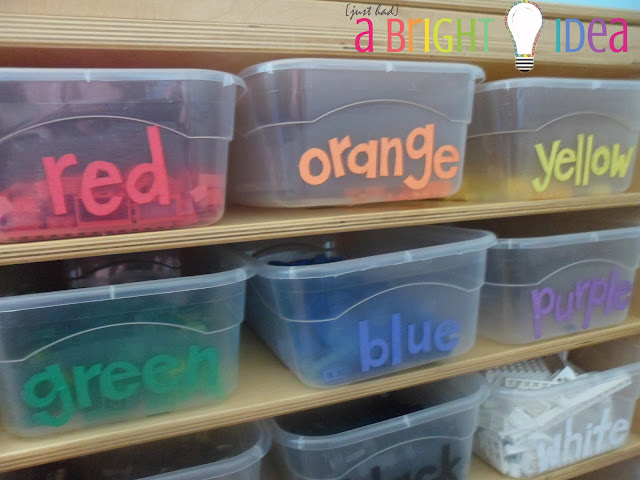
I decided the bins definitely needed some cute color labels. I couldn't find exactly what I wanted, so I decided to get some construction paper, freehand the letters and cut them out.


Then I used some Mod Podge to stick them onto the bins. I first did a thin layer on the front of the bin, then I stuck the letters on, and went over them with another thin layer.


I let them all dry and then put them all back into the shelving unit. And here we have the finished product:


Oh, and I kept secret the best part about this particular storage unit...which made it even so much more perfect:


The top opens so he can keep his boards in there and build on them when playing! It's like shelves and a table in one! I can't believe it never donned on me to use this piece for this purpose sooner!


Thursday, July 26, 2012

Painted Dressers

In mentally preparing to take on the nursery-to-toddler room project, I took a long hard look (maybe a few of them) at Breckin's room and decided what I would be keeping and what I would be moving out. I have two of these dressers that I got for free 6 or 7 years ago from one of my husband's friends looking to free up some of his storage space:


Being 22, pregnant with my first child and pinching every penny, I jumped on the offer. I had known I was going to do my baby's room in a beach-y surfer theme and I thought the bamboo-esque details of the dressers would fit the theme just right. But alas, my style has grown and matured, and I'm ready to be rid of them. Tanner's was actually moved to our storage unit when we gave him our bedroom set, but Breckin still has the other in his room.

Being a handy-dandy DIY-er, I almost consider it a sin to throw out usable furniture that is in generally good condition just because I don't like the look of it. I CAN CHANGE THE LOOK OF IT!

We have a blank space in our kitchen next to the fridge that I've always thought would be perfect for a buffet-type piece of furniture, or even a bar - having an extra surface and extra storage would be so nice for our little kitchen/dining area. *A-ha moment*: repaint the dresser and use it as a buffet! Seriously, I was pissed at myself for not having thought of it sooner. So that is the next project on my to-do list (and I have 2! So I will likely repaint the other one to fit better with my vision for Breckin's room!)

So without further adieu, here are my pins of lovely painted dressers that are inspiring my dresser re-do:

Originally Pinned from http://www.iheartorganizing.blogspot.com/ - I love the bright pop of color these dressers bring!
Originally Pinned from http://www.iheartorganizing.com/ - Classic white...this will likely be my choice of color for one of them.
Originally Pinned from: http://www.centsationalgirl.com/ - I love the details on the dresser top!
Originally Pinned from http://www.betterafter.blogspot.com/ - It looks like the handles were painted white to spruce them up a bit!
Originally Pinned from http://www.thehouseofsmiths.com/ - Add a fun pattern for visual appeal!
Originally Pinned from http://www.houzz.com/ - I love everything about this design set up
Originally Pinned from http://www.akreativeknack.blogspot.com/ - Very interesting idea!
Originally Pinned from http://www.betterafter.blogspot.com/ - I LOVE this color.
Hope this leaves you inspired to recreate some of that not-so-attractive furniture you've may have been considering throwing out and replacing! Why waste when you can create?

Become a follower of my Pinterest boards at www.pinterest.com/morgalicious483


Wednesday, July 25, 2012

Turquoise & Tangerine

Many years ago, when I was a graphic design student, I was taught the simple, yet harmonious and aesthetically-pleasing effect of pairing together opposite color hues. Reds and greens...purples and yellows....blues and oranges (go Boise State! Just had to throw that out there, tee hee.) And actually, the latter is one of my favorite combos to play with, hence last year's family photo session:

Smith Family - March 2011

As far as design goes, I love seeing these colors utilized in homes and offices. There are so many different shades of blue and orange to mix and match up. I personally love the corals and the light ocean blues. My oldest son's room's main color scheme is navy and light blue with pops of orange here and there.Here's some inspiration pics I found - maybe they will inspire you:

Joss & Main
www.barbaragilbertinteriors.com
www.pichomez.com - Love this nursery, wish I had done these colors! The orange chair is to die for.
www.christinefife.com


Tuesday, July 24, 2012

Lookie What I Found

So remember that gorgeous dress I posted about last week that I just HAD TO HAVE?

Literally the same day I published that post, I was at Kohl's perusing through their chic and affordable clothes when this caught my eye:

via

Oh-Em-Gee, right?!

It was almost identically-colored and patterned fabric! Not a maxi dress, but still, so pretty!


Sorry for the bad quality of my photo {and my hair, it was after work on a rainy day}...still trying to find the best spot in my house with the best lighting so I don't have to use the flash...grrrrr...I am so in need of a DSLR camera.

Anyway, here's a fun little outfit grouping I put together for it...let me know what y'all think! xoxo


LinkWithin

Related Posts Plugin for WordPress, Blogger...